
Drywall can look simple, but small errors show up fast. A seam can bump out. A screw can pop. A corner can crack. Many people fix the spot they see, but the real problem is often under the paint. This guide breaks down five drywall mistakes and how to avoid them. The goal is a wall that looks flat and stays that way. At Harmony Home For Everybody, we work as general contractors, and we also handle roofing and gutter cleaning. That matters because water from a roof leak or an overflowing gutter can ruin drywall from the inside. If you fix the cause first, your drywall repair has a much better chance of lasting.
Plan Your Sheet Layout Before You Hang
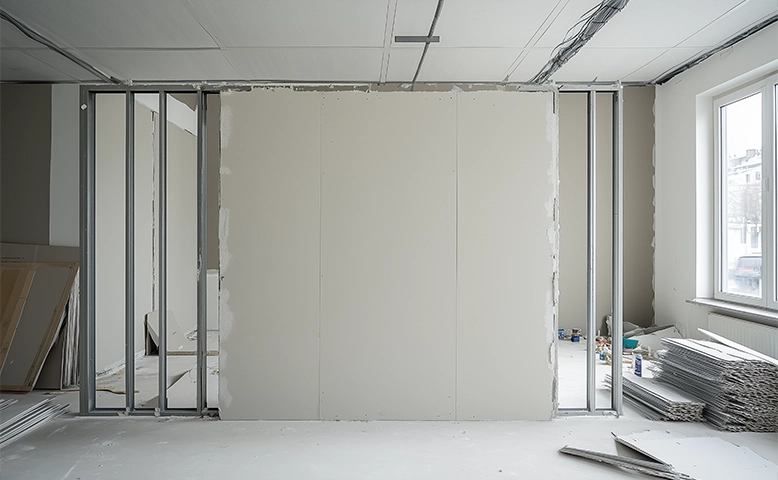
A lot of drywall trouble starts with poor layout. When sheets are placed without a plan, seams land in weak spots, and small strips end up near corners. Those thin pieces crack more easily and are hard to finish. A basic layout plan keeps your wall stronger and makes mud work faster.
Simple layout rules:
Keep factory edges (the long, tapered sides) meeting each other when you can, because they are made for tape and mud. Try to avoid “butt joints,” which are the square ends of drywall sheets. They can be hidden, but they take more skill and more mud.
Best order: hang ceilings first, then walls. That lets wall sheets support the ceiling edges.
Helpful checks before you lift a sheet:
- Mark studs so you can hit framing every time
- Stagger seams so they do not line up like bricks
- Keep seams away from door and window corners
- Doing this first helps stop cracks that come back later.
Use The Right Drywall For Each Room
Not all drywall is the same. Using the wrong type in the wrong place can lead to soft spots, stains, and mold. This happens most in bathrooms, laundry rooms, kitchens, and basements, where the air gets damp. Regular drywall can soak up moisture and swell. Once it swells, it rarely goes back to flat.
Pick the board based on the space:
- For dry rooms: standard drywall is fine for bedrooms and living rooms.
- For damp rooms: moisture-resistant drywall (often called “green board”) can help in a bathroom wall, but it is not a good choice inside a shower.
- For shower and tub walls: use a tile backer like cement board or a foam backer made for wet areas.
- For garages (often required): Type X drywall is used in many places because it slows fire spread.
If your ceiling drywall is stained, look up; roof leaks and clogged gutters can drip into ceilings. Harmony Home For Everybody can handle roofing and gutter cleaning, so the drywall fix is not wasted.
Fasten Boards Well To Stop Nail Pops
Drywall needs strong, even fastening. If the screws are too deep, too shallow, or too far apart, the sheet can move a little. That movement shows up later as popped screws, cracks, or loose corners. This is common when people rush, use the wrong screws, or miss studs.
- Use drywall screws, not random wood screws. Drywall screws are made to grab wood or metal studs and sit flat.
- Drive screws to the right depth: the head should sit just below the surface, making a small dimple, but it should not tear the paper face. If the paper rips, the screw loses holding power.
Basic spacing that works in many cases:
- About 8 inches between screws along edges
- About 12 inches between screws in the middle of the sheet
Mark stud lines on the drywall with a pencil. That keeps screws in the framing instead of empty space. If you miss a stud, remove the screw and re-drive it in the right spot. “Air screws” do nothing and can cause bumps under paint.
Tape And Mud Slowly For Smooth Seams
Most ugly drywall comes from rushing the tape and mud steps. Thick mud shrinks as it dries, which can leave dips or cracks. Skipping dry time can trap moisture and cause peeling or bubbles. The fix is simple: thin layers, full dry time, and the right materials.
Tape basics: Paper tape is strong and works well on long seams, but it needs a thin bed of mud under it. Mesh tape is easier for small patches, but it can crack on long seams if you use the wrong mud.
Mud types (plain terms):
- All-purpose compound: good for the first coat and many repairs
- Topping compound: sands more easily for the last coat
- Setting compound (“hot mud”): hardens by a chemical set, good for deep fills and fast patches
A simple seam plan: bed the tape in a thin coat, scrape it flat, then add two or three thin coats, each one wider than the last. Let each coat dry fully. A fan helps air move, but do not blast heat at wet mud, or it may dry unevenly.
Sand, Clean, And Prime So Paint Looks Even
Even good mud work can look bad if sanding and paint prep are sloppy. Over-sanding can cut through tape or fuzz the drywall paper. Understanding leaves ridges that you will see once paint goes on. Dust left on the wall can also ruin paint and cause a rough texture.
- Sanding rules: Use a sanding sponge or a pole sander and apply light pressure. Your goal is to knock down high spots, not grind the wall.
- Use a light to check your work: shine a lamp across the wall from the side. This side light makes bumps and lines easy to spot.
- Clean before paint: vacuum dust or wipe gently with a barely damp cloth. Let it dry.
- Prime every repair: drywall mud and paper absorb paint in different ways. If you skip primer, the wall can look patchy even with good paint. A drywall primer (often called PVA primer) helps the paint look even.
- Water warning: if a stain keeps coming back, do not keep repainting it. Find and fix the leak first; roof and gutter issues often show up as ceiling drywall damage.
Simple Steps Today Can Save Repairs Tomorrow
Drywall problems usually come from the same five mistakes: poor layout, wrong board choice, weak fastening, rushed mud work, and skipped prep before paint. Fixing drywall the right way is not about fancy tricks. It is about small steps done in the right order. If your drywall damage is tied to water, the real fix may be outside the room, on the roof, or in the gutters. Harmony Home For Everybody can help with the full picture as general contractors, with support for roofing and gutter cleaning, so water stays where it should. If you have cracked seams, popped screws, or ceiling stains, contact Harmony Home For Everybody today to set up a repair plan and stop the cause before it spreads.